Hi Stampers,
I just ran across the instructions for the bucket, this is the same as the Santa pants that I posted a couple days ago.
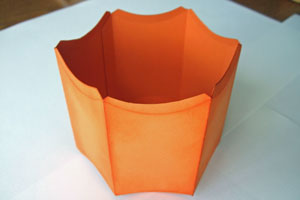
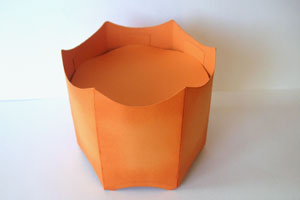
Pillow Box Bucket
by Lynn Put
Create an adorable bucket with Pillow Box die cuts.
Supplies
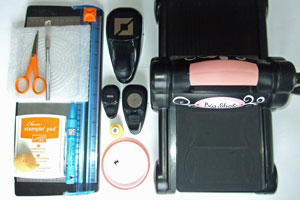
- Three Pillow Box Die Cuts (Pumpkin Pie Cardstock used here)
- Tacky Tape™, or other strong adhesive
- Scissors
- Three 1" x 5" Cardstock Strips for bucket bottom (Pumpkin Pie Cardstock used here)
- One 3/4" x 11" Cardstock Strip for bucket handle (Old Olive Cardstock used here)
- Two 4" cardstock Circle for bucket bottom
- Additional cardstock and punches for embellishment
- Paper Cutter with scoring blade
- Horizontal Slot Punch
- Sponge
- Ink (Pumpkin Pie Classic ink used here)
- Two Brads
Step-by-Step
-
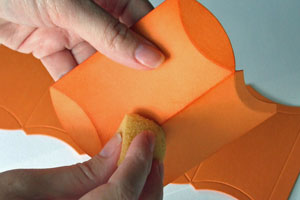
Step 1
Pre-fold each pillow box die cut on score lines and sponge with ink.
-
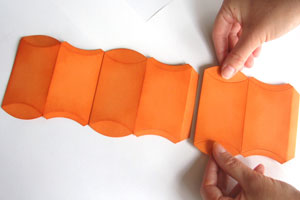
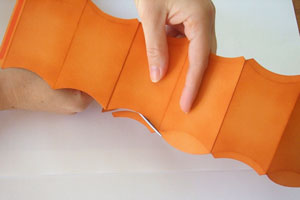
Step 2
Apply Tacky Tape™ to the long horizontal tabs on two of the boxes and tape together as shown in picture, leaving flat.
-
Step 3
Choose one side to be the top of your bucket and trim the three rounded Pillow box tabs so that all edges are the same.

-
For the bottom edge of your bucket you will need to trim off all tabs (as shown in picture).
-
Step 4
Using Tacky Tape, tape last pillow box to form your bucket.
-
Step 5
Each 1”x 5” strip of card stock will need to be scored at each end ½”.
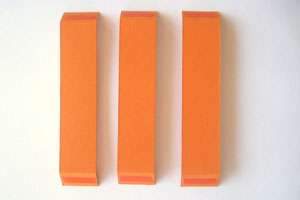
-
Apply
Tacky Tape™ to the very ends (on one side) and tape them to the inside
bottom of the bucket ¾” from the bottom with the ½”scored strip facing
the bottom of the bucket.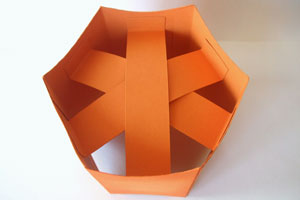
-
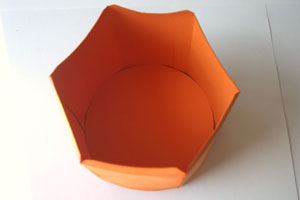
Step 6
Apply tape to the bottom of the criss crossed strips
-
and tape 4” circle in place.
-
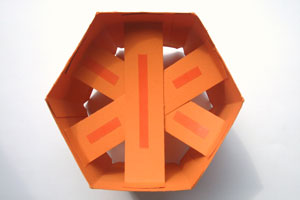
Step 7
Flip bucket over and place the second 4” Coluzzle circle inside the bottom of the bucket.
-
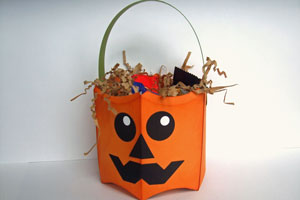
Step 8
Decorate Bucket front if wanted.
Used here:
Two 1" black circles for eyes, 3 1/4" white circles for eyes, 3 black
photo corner punch-outs for mouth, one hand-cut triangle for nose.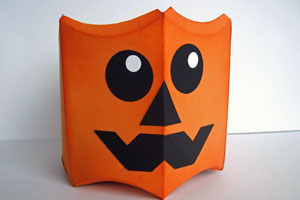
-
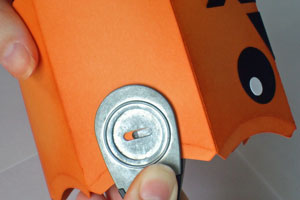
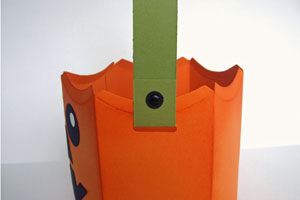
Step 9
Make elongated punches on each side of the bucket using the Horizontal Slot punch
-
and feed the handle through, fold and attach with tape or brads.
-
Step 10
Fill your Pumpkin Bucket with Halloween candy or small gift.
What a totally awesome tutorial Tammie!! Believe it or not, this is one of the few dies I do not have (wish I did after seeing this). Wow, I just can’t get over how good this is — you need to do more of these, like every time you give a demo at RubberQueen meeting you can create a tutorial from the presentation for us that sit in the back.